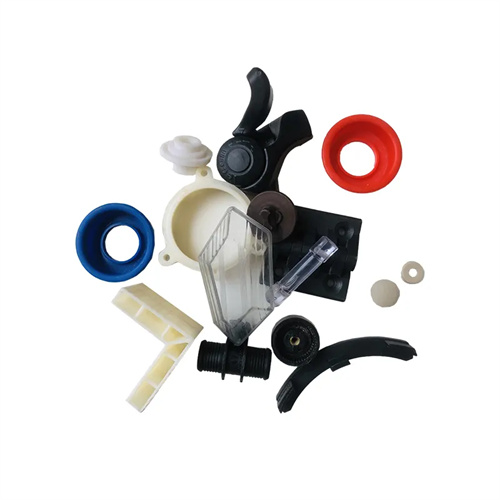
Considerations for designing thermal conductive cooling channels for injection molding
The design of thermal conductive cooling channels for injection molding must prioritize cooling uniformity, as this is key to avoiding defects such as warping and sink marks in plastic parts. Cooling channels should be evenly distributed along the contour of the part and maintained at a consistent distance from the cavity surface, typically 15-25mm. Too close a distance can lead to localized, overly rapid cooling, while too far a distance can result in inefficient cooling. For parts with uneven wall thickness, the position of the channels should be adjusted accordingly: channels in thick-walled areas should be closer to the cavity (15-20mm away) and more densely spaced; the distance between channels in thin-walled areas can be increased appropriately (20-25mm). For example, a part with 5mm-thick reinforcing ribs and a 2mm-thick main wall should have a water channel below the rib 18mm from the cavity, while the water channel corresponding to the main wall is 22mm away. The spacing between channels in the rib area is shortened to 50mm (80mm in the main wall area) to ensure consistent cooling rates across all parts. At the same time, the temperature difference between the inlet and outlet of the water channel should be controlled within 5°C. This can be achieved by using multiple sets of parallel water channels or adjusting the water flow rate to avoid uneven shrinkage of different parts of the plastic part due to excessive temperature difference.

The design of thermal conductive cooling channels for injection molding requires a rational selection of channel diameter and flow rate to ensure adequate cooling efficiency. The channel diameter is typically determined by the size of the molded part: 8-10mm for small parts, 10-12mm for medium-sized parts, and 12-16mm for large parts. A diameter that is too small can easily clog and inadequate cooling area, while a diameter that is too large increases mold processing difficulty and cost. The water flow velocity should be controlled between 1.5-5m/s. A flow velocity that is too low results in laminar flow and low heat exchange efficiency; a flow velocity that is too high increases pressure loss and requires a high-pressure water pump. For example, a 10mm diameter channel with a flow rate set at 3m/s produces a Reynolds number of approximately 20,000 (turbulent flow), resulting in heat exchange efficiency over three times higher than laminar flow (0.5m/s). In addition, the cross-sectional area of the water channel must match the pump flow rate. The calculation formula is: flow rate (L/min) = flow velocity (m/s) × water channel cross-sectional area (mm²) × 60 / 1000. For example, for a water channel with a diameter of 10mm (cross-sectional area of 78.5mm²) and a flow velocity of 3m/s, the required flow rate is 3×78.5×60/1000≈14.1L/min. During design, it is necessary to ensure that the water pump meets the flow requirements.
The design of thermal conductive cooling channels for injection molding must avoid interference with other mold structures to ensure feasibility and easy maintenance. Channels must avoid components such as ejector pins, inclined guide posts, and bolts, maintaining a minimum distance of 5mm from these components to prevent damage to other structures during drilling or water leakage. For example, when routing channels around ejector pins in a mold, the center of the channel is kept 8mm away from the pin to avoid interference while ensuring effective cooling near the ejector pin. For molds with lateral core pull mechanisms, the channels must bypass the core pull slider. Curved channels or flexible hoses can be used to ensure unimpeded cooling in the core pull area. Furthermore, the inlet and outlet of the channels should be located on non-operating surfaces of the mold and easily accessible for pipe connection. Quick connectors should be installed at the inlet and outlet, and the connector type should match the cooling system (e.g., G1/4 or G3/8). To facilitate the removal of scale and impurities from the channels, the channels should be open (with the water inlet and outlet located on either side of the mold) to avoid blind holes. Complex channels can be cleaned regularly with high-pressure water or a specialized cleaning agent.
The design of conductive cooling channels for injection molding requires consideration of the mold material’s thermal conductivity. Different mold steels have significantly varying thermal conductivity coefficients, which can affect cooling effectiveness. Commonly used pre-hardened steels (such as 718H ) have a thermal conductivity of approximately 30 W/(m・K) , while stainless steels (such as S136 ) have a thermal conductivity of approximately 16 W/(m・K) , only half that of pre-hardened steel. Therefore, when using stainless steel molds, it’s necessary to compensate for this thermal conductivity deficit by increasing the number of channels or reducing the distance between the channels and the mold cavity. For example, the channels in an S136 mold should be 3-5 mm closer to the cavity than in a 718H mold . For insert molds, if the inserts are made of a high-thermal-conductivity alloy (such as beryllium copper, with a thermal conductivity of 200 W/(m・K) ), densely packed fine channels ( 6-8 mm in diameter) can be designed within the inserts to quickly dissipate heat using their high thermal conductivity. This is particularly useful in hot spots (such as thick-walled protrusions) within the plastic part. In addition, the roughness of the inner wall of the water channel will also affect the thermal conductivity. Polishing the inner wall to below Ra0.8μm can reduce water flow resistance, improve heat exchange efficiency, and increase the cooling speed by 15%-20% compared to unpolished water channels.
The design of thermally conductive cooling channels for injection molding requires simulation and verification of cooling effectiveness. CAE analysis software is used to predict cooling time and temperature distribution, allowing for optimized channel layout. The simulation requires input of the part’s 3D model, material parameters (such as thermal conductivity and specific heat capacity), and process parameters (such as melt temperature and mold temperature). The temperature distribution on the cavity surface is analyzed, with a temperature difference of no more than 10°C. For example, simulations revealed that the temperature in a corner of a large part was 15°C higher than other areas. By adding angled channels in the corner (at a 45° angle to the cavity surface), the temperature in that area was reduced to the same level as the rest of the area. During the mold trial, the actual cooling time and demolding temperature of the part are measured and compared with the simulation results. If the cooling time is excessive (exceeding 20% of the theoretical value), the channel diameter or number of channels should be increased. If the part exhibits sink marks caused by localized overheating, auxiliary channels should be added to the corresponding areas. Furthermore, thermocouples can be used to measure the mold cavity surface temperature to verify cooling uniformity in the channels, ensuring that the temperature deviation at each measurement point is within ±3°C, thereby ensuring consistent part quality.