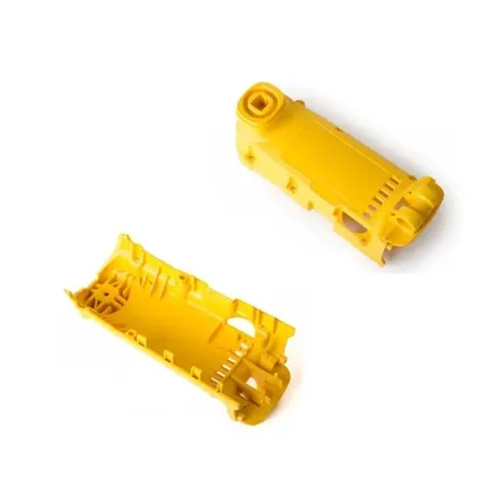
Defective injection molded metal inserts
A common symptom of defective injection molded metal inserts is loosening or falling off. This is primarily due to insufficient bonding between the metal insert and the plastic, which cannot withstand the vibration or tensile forces experienced during use. Reasons for this inadequate bonding include a smooth insert surface without anti-slip features, a significant difference in shrinkage between the plastic and metal, or insufficient plastic fill around the insert during injection molding. Solutions can be found by designing the insert structure. Anti-slip features such as knurling, bosses, or grooves can be incorporated into the insert surface. For example, a 10mm diameter cylindrical insert can be treated with a knurled surface (0.5mm pitch, 0.2mm depth), or three 0.5mm high bosses can be added along the axial direction to increase the mechanical bond between the plastic and the metal. The insert’s length-to-diameter ratio should be reasonable (typically 2-5). For example, an 8mm diameter insert should have a length of 20mm to ensure sufficient contact area, enabling bonding forces exceeding 500N. For material combinations with significantly different shrinkage rates (such as metal inserts and PE plastic), reinforcing ribs should be placed around the inserts or a plastic with a lower elastic modulus (such as POE-modified PE) should be used to reduce gaps caused by shrinkage stress. The metal insert in a motor end cap was loose due to its smooth surface. Knurling increased the bonding force from 150N to 600N, meeting the required performance.
Defective injection molded metal inserts can also manifest as cracks or flash in the plastic surrounding the insert. This is often caused by insufficient insert preheating, excessive injection pressure, or poor plastic flowability, resulting in excessive stress at the insert-plastic interface. The thermal expansion coefficient of metal inserts is much lower than that of plastic (for example, steel has a thermal expansion coefficient of 12×10⁻⁶/ °C, while PA66 has a thermal expansion coefficient of 80×10⁻⁶/ °C). If the insert is not preheated, the hot plastic will come into contact with the cold insert during injection molding, causing rapid cooling and contraction of the surrounding plastic, resulting in internal stress cracking. The insert preheat temperature should be set according to the melting point of the plastic. For example, for PA66 injection molding, preheat the insert to 120-150 °C, and for ABS injection molding, preheat to 80-100 °C, ensuring that the temperature difference between the insert and the plastic is within 100 °C. Injection pressure should be controlled in stages, with lower pressure applied around the insert (e.g., 10%-20% lower than normal). For example, injection pressure could be 100 MPa in the general area, while it could be reduced to 80 MPa around the insert to reduce impact on the insert. Improving plastic fluidity, such as increasing the melt temperature by 10-15°C or adding a flow modifier (e.g., adding 5% silicone oil to PA66), allows the plastic to fully fill the fine structures around the insert, avoiding stress concentration caused by insufficient filling. Cracks appeared around the metal sleeve insert of a gear. Preheating the insert to 130°C and reducing the injection pressure by 15% completely eliminated the cracks.
Inaccurate positioning or deflection of metal inserts is a common defect that can lead to dimensional deviations or assembly difficulties in plastic parts. This is primarily due to the insert being loosely secured in the mold, wear on the mold’s positioning mechanism, or uneven impact force from the melt during injection. Inserts should be secured in the mold using an interference fit or mechanical clamping. For example, the clearance between cylindrical inserts and mold positioning holes should be controlled within 0.01-0.03mm, or a spring chuck should be used to automatically clamp the insert to ensure zero displacement during the injection molding process. Mold locating pins and guide pins should be inspected regularly and replaced if wear exceeds 0.02mm to ensure mold clamping accuracy and avoid inaccurate insert positioning due to mold deflection. For large or asymmetrical inserts, the gate position should be optimized to ensure even coverage of the melt. For example, gates can be placed symmetrically on both sides of the insert to reduce displacement caused by unilateral impact force. The metal pin insert of a certain automotive connector had an excessive deflection (0.3mm). By replacing the mold locating sleeve (reducing the fit clearance from 0.05mm to 0.02mm) and adopting a symmetrical gate, the deflection was controlled within 0.05mm.
Rusting of metal inserts or chemical reactions with plastic can lead to degraded plastic part performance, manifesting as surface rust, discoloration of the plastic, or weakened interfacial bonding. This is often caused by the lack of rust-proofing or the presence of corrosive components in the plastic. Surface treatments such as galvanizing (5-10μm thickness), nickel plating (8-12μm thickness), or passivation are necessary to improve corrosion resistance. For example, a carbon steel insert galvanized and then passivated can withstand a 48-hour salt spray test without rust. Chemical reactions between plastic and metal should be avoided. For example, chlorinated plastics (PVC) should not be used with copper inserts, as copper chloride can corrode the inserts. The moisture content of PA66 plastic should be controlled (<0.1%) to prevent acidic corrosion from being released upon water absorption. Providing an isolation layer between the insert and the plastic, such as an epoxy resin coating (5-10μm thickness), can prevent direct contact between the two and is suitable for sensitive material combinations. The copper insert of a bathroom plastic part developed green rust after coming into contact with ABS plastic. By nickel-plating the copper insert and coating it with epoxy resin, the rust disappeared after 6 months of use.
Process control and inspection of injection-molded metal inserts are crucial for preventing defects. Strict process parameter management and quality inspection procedures are essential. Insert pretreatment (such as cleaning and preheating) must be standardized. After cleaning, inserts should be stored for no more than four hours to prevent secondary contamination. The preheating temperature should be monitored in real time with an infrared thermometer, with fluctuations controlled within ±5°C. During the injection molding process, the fill pressure and temperature around the insert must be monitored to ensure a smooth pressure curve with no abnormal fluctuations (fluctuation < 5%). Quality inspections should include insert position (using a three-dimensional coordinate measuring machine with an accuracy of ±0.01mm), adhesion (tensile testing, recording the maximum tensile force), and appearance (absence of cracks and rust). Fifty pieces are sampled per batch, and production must be halted for adjustments if the defect rate exceeds 2%. For example, one company implemented an online visual inspection system that automatically identifies insert deflection and surface defects, increasing inspection efficiency from 10 pieces/minute (compared to manual inspection) to 60 pieces/minute, and reducing the missed defect rate to below 0.1%. By improving the process control and testing system, the defective rate of injection molded metal inserts can be reduced from over 5% to below 0.5%, ensuring product reliability.
