Tolerance and roughness requirements for injection mold bases
The injection mold base is the mold’s foundational framework, supporting key components such as the cavity, core, and guide mechanism. Its tolerance and roughness requirements directly impact the mold’s assembly accuracy, smooth motion, and service life. Tolerance control for the mold base encompasses the dimensional and geometric tolerances of each panel, while roughness controls the machining accuracy of mating and non-mating surfaces. Proper tolerance and roughness design ensures coordinated operation of mold components and improves the quality and stability of the molded product.
The dimensional tolerances of mold base panels must be determined based on their function and assembly requirements. The thickness tolerance of templates (such as the fixed and movable templates) is typically controlled within ±0.05mm to ensure accurate mold closing between the cavity and core. The diameter tolerance of guide pin and guide bushing mounting holes is generally H7, ensuring a clearance between the guide pins and bushings of 0.01 and 0.03mm, ensuring both guiding accuracy and preventing sticking. For example, if the fixed template is designed to be 50mm thick, its actual dimensions should be within the range of 49.95 to 50.05mm. A guide pin mounting hole with a 20mm diameter and an H7 tolerance range of 20 to 20.021mm creates a clearance of 0.013 to 0.021mm when combined with an H6 tolerance guide pin (20 to 19.987mm). For non-matching panel components, such as backing plates and legs, the dimensional tolerance can be relaxed to ±0.1mm to reduce processing costs.
The mold base’s geometric tolerances are crucial to the mold’s motion accuracy, primarily including flatness, parallelism, and perpendicularity. The mold base has high flatness requirements, with the working surface flatness of the fixed and movable mold plates generally not exceeding 0.02mm/m to prevent mold deformation that could lead to loose molds or flash on the finished product. Parallelism between the mold plates (such as the fixed and movable plates) is controlled within 0.03mm/m to ensure uniform force on the guide pins and guide sleeves. The perpendicularity requirements between the guide pins and the mold plate are even stricter, typically not exceeding 0.01mm/100mm, to prevent the guide pins from experiencing additional torque during movement, which could lead to accelerated wear or seizure. For example, the guide pins of a mold base with a length of 200mm must have a perpendicularity error within 0.02mm, which is ensured through precision grinding and testing.
The roughness of the mold base’s mating surfaces directly impacts assembly accuracy and kinematic performance. The mating surfaces of guide pins and guide sleeves must meet a roughness of Ra0.4-0.8μm to reduce friction, wear, and heat during relative motion. The mold plate’s mating surface roughness is typically Ra0.8-1.6μm to ensure sealing during mold closing and prevent melt leakage. The mating surfaces of locating pins and locating holes must have a roughness below Ra0.8μm to ensure positioning accuracy. Non-mating surfaces (such as the sides and back of the mold plate) have lower roughness requirements, typically Ra3.2-6.3μm. They only need to meet aesthetic and rust-proofing requirements, without requiring high machining precision.
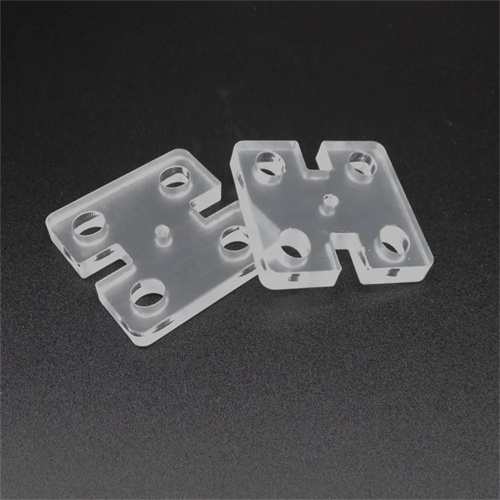
The guide pins and guide sleeves of the mold base are key mating components, requiring even more stringent tolerances and roughness. The outer diameter tolerance of the guide pin is typically h6-h7, with a surface roughness of Ra0.4μm and a cylindricity of no more than 0.005mm. The inner diameter tolerance of the guide sleeve is H7-H8, with an inner bore surface roughness of Ra0.4μm and a roundness of no more than 0.003mm. The clearance between the guide pin and sleeve is determined based on the mold size and precision requirements. For small precision molds, the clearance is 0.005-0.01mm, for medium-sized molds it is 0.01-0.02mm, and for large molds it is 0.02-0.03mm. For example, the guide pin of a precision electronic mold has a diameter of 16mm and a tolerance of h6 (16-15.987mm), while the guide sleeve has an inner diameter of 16mm and a tolerance of H7 (16-16.018mm). This creates a clearance of 0.007-0.018mm, ensuring precise guidance and smooth movement.
In actual manufacturing, mold base tolerances and roughness must be maintained using advanced processing equipment and testing methods. For example, high-precision surface grinders are used to machine the mold plate surface to ensure flatness and roughness, while jig grinders are used to machine the guide pin and guide bushing mounting holes to ensure positional accuracy and dimensional tolerances. Furthermore, mold bases must undergo post-assembly testing, such as post-mold parallelism testing and guide pin and bushing kinematic flexibility testing, to ensure they meet design requirements. For molds used over a long period of time, mold bases must be regularly inspected for wear. If the mating surface roughness exceeds Ra1.6μm or the clearance exceeds 50% of the design value, repair or replacement is necessary to maintain proper mold performance. Strict control of mold base tolerances and roughness lays a solid foundation for stable mold operation.
